This tutorial teaches you how to use the manual exposure mode or "M"-mode on any Canon EOS camera. I will show some examples from my Canon EOS 400D but the techniques should stay the same across different models.
Why would you want to shoot in Manual Mode when you have automatic modes (P/Av/Tv) that can handle almost any light situation automatically? Because they can do it only "almost". Sometimes the light in a scene is too difficult for the light meter. At other times, you want to get the exact exposure of a scene every time. Then you should consider turning your mode wheel to the "M"-mode.
Exposure Basics
First, I will talk a little about the basics of exposure of cameras. The three factors that control exposure are:
- Shutter Speed - how long you expose the photo (e.g. 1/200)
- Aperture - How much light you allow through your lens (e.g. F/8.0)
- ISO sensitivity - amplification of the light on the sensor (e.g. ISO 100)
Changing one of them will affect the exposure of the photo. If you change another factor, you can compensate or amplify the first change.

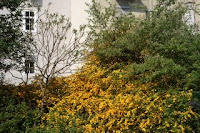
To make this more clear, I will explain it by using an example. Let's say the light meter tells you that the scene you are looking at requires a setting of 1/200s at F/8.0 using ISO 100. The picture on the right was taken with these exact settings.

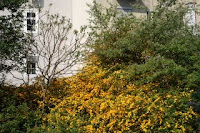
If you do not want to have a shutter speed of 1/200s, it is possible to set it to 1/400. As you only will have half the exposure time then, you need to compensate to get the same amount of light in your photo. You can either do this by increasing the ISO to 200 (double the sensitivity) or open up the aperture by one stop to F/5.6.
The two pictures above were made with the described change of the aperture. The second image looks almost the same. By opening the aperture, you will have a more shallow depth of field though.
The following exposure/aperture settings will also produce an correctly exposed photo:
| Time: | 1/25 | 1/50 | 1/100 | 1/200 | 1/400 |
| Aperture: | F/22 | F/16 | F/11 | F/8.0 | F/5.6 |
The table only shows one-stop increments. Most cameras support 1/3 stop increments, so there are 2 more possible combinations per entry. For more information take a look at
F-Numbers on Wikipedia.
Reading the Histogram
The most important measurement tool for the manual mode will be the
histogram. It tells you the exact distribution of tonal values in your photo. This means you can determine if your image is correctly exposed (you can find more information
here). I will not go into detail about how a correctly exposed histogram should look like because this depends pretty much on the scene. What is important is to recognize and under- and overexposed image.

The picture above shows an underexposed, correctly and overexposed version of the photo. As you can see, the underexposed image lacks all high tonal values. The overexposed version does look quite OK in the histogram, but the high tone values start gathering at the brightest value. This leads to 100% white pixels in some areas.
Manual Exposure
Now you know all the basics that you need to know in order to operate your camera in manual mode. All you need to do is to set set the initial exposure and then work with the histogram until it looks right to you.
In order not to start with a random guess about correct exposure values, it can help to set the camera into Program mode (P) and copy the suggested values to manual mode. Also, the camera shows the light meter in manual mode. The light meter is the bar that reads
-2..1..0..1..2 and has a blinking bar. Try to get the bar to stop below 0 (you need to half-press the shutter button to get it to work).
Then you can adjust your settings by changing either the exposure or the aperture value. Canon cameras support 1/3 stop increments. So when your image is underexposed by one exposure value (EV) or stop, you need to open up the aperture by 3 times 1/3 steps or increase the exposure time by 3 steps (double the exposure time).
On the Canon EOS 400D you can change the exposure time by turning the wheel next to the shutter release button. The aperture can be changed by simultaneously pressing the
Av button next to the screen and turning the wheel.
To check your photo's histogram, take a picture and show the picture on your camera. Now press the
DISP. button until the histogram is shown on the screen. The histogram has four gray vertical bars on it which are spaced at one-stop increments. This means that if you change the exposure time by one stop, the whole histogram will shift by exactly one bar. This is very useful to estimate how much you should change your settings.
Bar number 2 from the left is the 18% gray bar. This means that your camera will try to balance your picture around that exposure in auto mode. To verify this, you can take a shot of a clear blue sky or a white wall in auto mode. Then you should see a large peak of the histogram exactly there.
Now change the settings of aperture, exposure time and ISO as you like. When you have found the correct settings, you can take as many pictures of the same subject at the same light as you like. No matter what disturbs the camera's light meter, you will not get under- or overexposed photos.
When to use Manual Mode
I use manual mode in the following situations:
- Night shots
- When using an external flash (in order to balance between flash and available light)
- Difficult lit indoor scenes, especially with backlight
- changing lights that do not affect the subject directly
But you can find out for yourself when to use the manual mode. Whenever you get wrong results for a type of subject, start to think about going manual.
Do not forget to switch the camera back to an automatic mode afterwards. It's too easy to forget that the camera will not set the correct exposure automatically. This can ruin some shots if you don't think about it.
If you have any questions or find some parts of this tutorial not understandable, please leave a comment! I'll try to clarify it for you then.


